This guide will show you how to create your public app. To learn how to authenticate your app, click here.
Overview
In order to access Wish data through the merchant API, you must first register a public app. This app will have to be authenticated using the OAuth 2.0 specification. At this time, you are only allowed to have one public app.
NOTE: If you are a merchant and want to create an application only for yourself, learn about how to create a private app here. Private apps cannot be shared among multiple merchants.
Creating your first app
To create your first app, log in to your merchant dashboard and select the Account dropdown menu. Then select Create App.

You will be redirected to a page with a form shown below. Here you can fill out information about your new app.

The redirect URI is an endpoint that is owned by you. This will be the URI to which we send the authorization code. This URI must use HTTPS. For more information on how this endpoint will be used, click here.
The other details that you provide on this form will be displayed in the official Wish App Store where merchants can browse for apps like yours. The fields that merchants will see are Value proposition, Description, Website, and Support email. If you do not provide sufficient information, your app may not qualify to be listed in the Wish App Store. If you want to make sure your app is shown in the Wish App Store, make sure to at least provide a website and description.
For information about adding translated listings, please see the Adding translated listings section below.
View details about your app
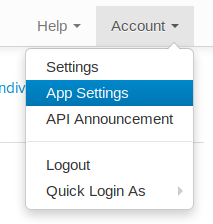
After you create your app, you will be redirected to the show page where you can see details of the app you just created. You can also access this page directly by going to Account > App Settings:
This page provides a preview of what your app listing will look like in the official Wish App Store. From this page, you can also click the appropriate button to edit or delete the app.

After an admin approves your app, the approval status will change to Approved:

If your app is rejected, you will see the status Rejected and you will be able to edit the app.

Note: if you update your app and the update is rejected, you will see the updates you made and buttons to continue revising or cancel your update. Clicking Revise update allows you to edit the app with the details from your last submission pre-filled.

Updating your app
From the show page you can click Edit app listing to go to the update page.

After you update your app, you can see the changes you submitted for approval on the show page:

Remember, if you do not provide sufficient information, your app may not qualify to be listed in the official Wish App Store.
For information about adding translated listings, please see the Adding translated listings section below.
Adding translated listings
You can add translated listings for your app on either the create or edit page. The appropriate translated listing for your app will appear for merchants based on their regional language settings.
On either of those pages, click the Add translated listing button under Listing Language.
A window will appear where you can select a language.
After you select a language, you will be redirected to a simplified form where you can add the appropriate details for that language.

After saving your changes, you will be able to see the translated listings on the show page by selecting the language from the dropdown menu.

Here's an example of what the page will look like when you choose to view the listing in Chinese:

If you want to view/edit these translated listings later, you will be able to see the languages that have translated listings in the Listing Language drop down menu on either the create or edit page.